

If writing about a writing app is too meta, then call me guilty. I’m still in my honeymoon phase using my newest tool – Ulysses. Switching to it has been like going from a hammer to a nail gun! It’s a great app for blogging if you’re on WordPress, Medium, and now Ghost! So I want to share a little how I’m currently using it.
Library Setup
In the Library, where Groups and Filters go, I’ve got a top Group for my blog. Under that, there are four sub objects:
- Meta is a Group containing all my personal notes about my blog. For example, I’ve got notes about what categories I want to use.
- Drafts is a Filter and is just what it says. Like on WordPress, this is where I start writing stuff. More on this later.
- Scheduled is also a Filter. It’s like what you find on WordPress. After I’ve written a draft post, it gets edited and polished in the Scheduled filter.
- Published is the last Filter where I keep all my live posts. It’s my local “raw” copy. After publishing to WordPress through Ulysses, I also publish to PDF and store it in the Files app on my iPad. This means these copies are in iCloud.

The thing about the last three Filters is that I never need to “send” or “move” or “drag and drop” any of my posts to them. This is because each one is set to one Keyword.
My “Drafts” keyword is red. “Scheduled” is yellow. And – you guessed it – “Published” is green!
I simply add the right keyword to my posts corresponding to the stage they’re in, and they auto-magically get sorted into the proper filters. Works every time!
Template Setup
This is where things get more interesting. I like my blog posts to be done a certain way. And I want them to be consistent. With Ulysses, I can make this happen easily.
I created a “Sheet” and called it “Blog Post Template.” It’s already got the red keyword, “Draft,” applied to it. It also has one extra keyword in the color grey, “Template.” Creative, I know.
When I’m ready to start a new draft post, I swipe the template, tap the ellipses, and then tap, “Duplicate.” Viola! Right there in the Drafts filter is my new post. But wait, there’s more.
This template – now a new draft – is preset with text fields in it. At least that’s how it looks. The fields are indicated by the ‘%%’ Comment Blocks that span entire paragraphs. Each one is labeled for the different parts of the post: intro, body, conclusion, call to action. And the dividing lines between each section are ready to go.
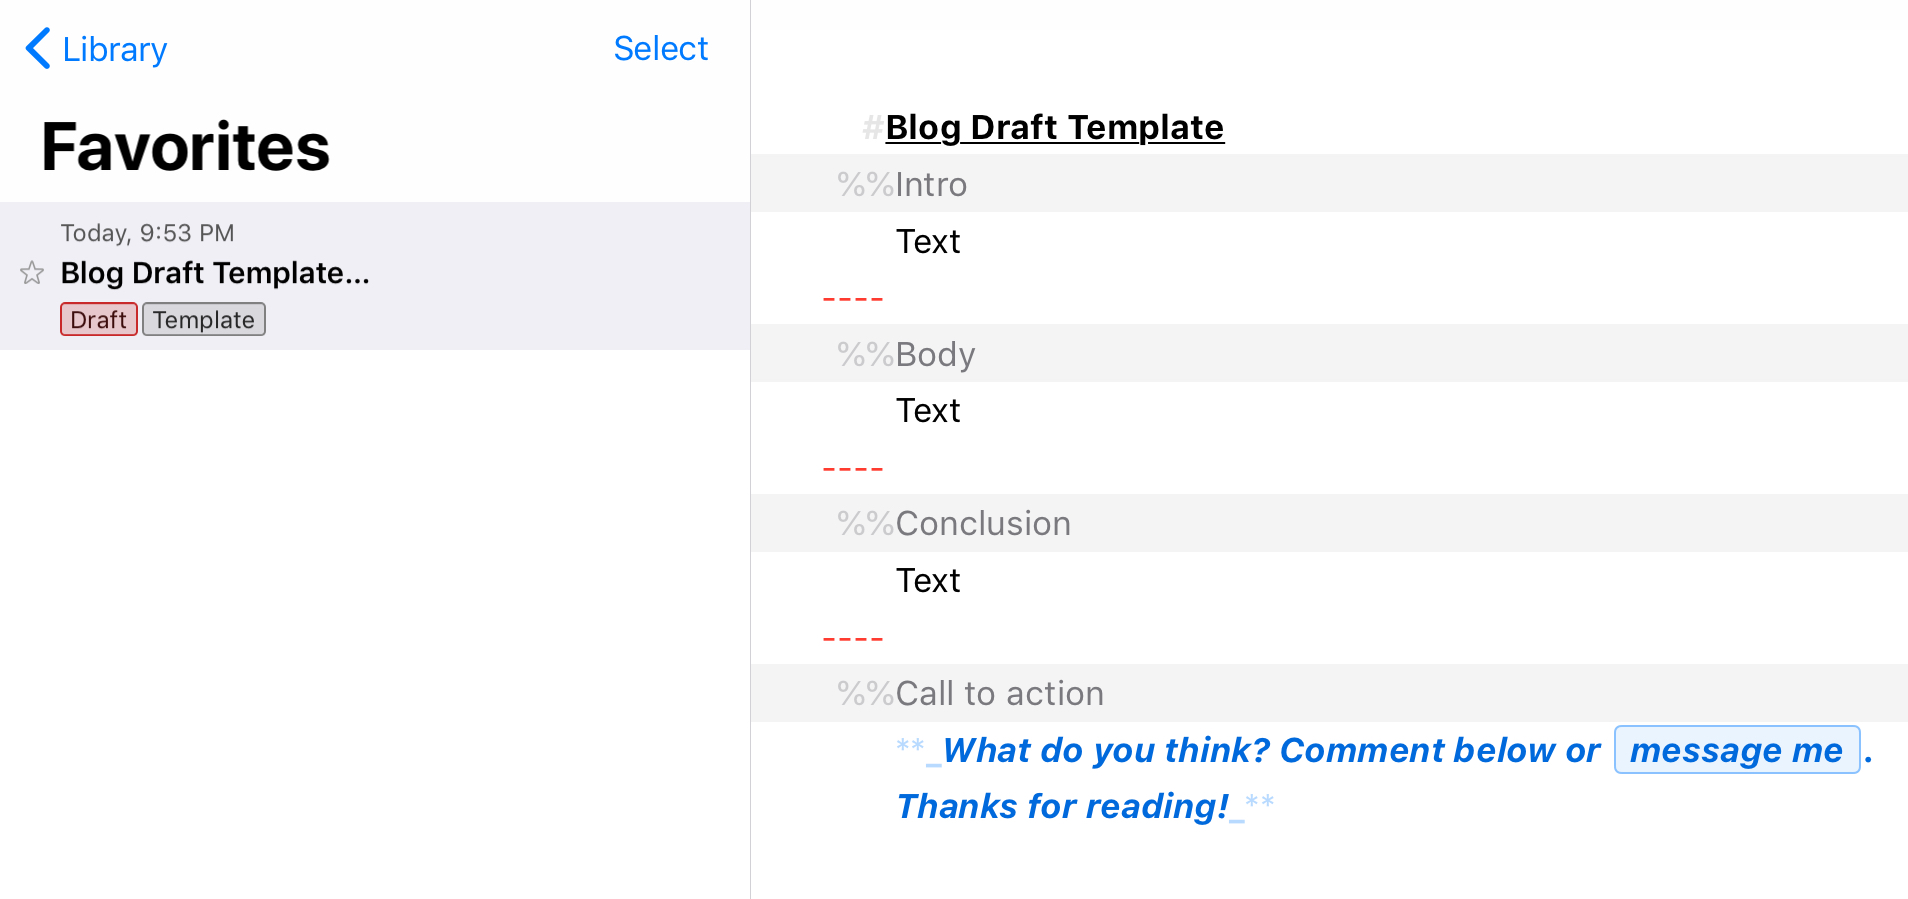
On top of that, my “Call to action” section already has the basic text I use, including a link to my Contact info, and it’s already defined to be strong and emphasized.
Finally, this template is also marked as a Favorite sheet, so it’s always ready to get at in the special Favorites group.
This is how I’ve set up Ulysses to help streamline my blogging. In addition to that, I simply use the built-in publishing features to automatically get my posts up on WordPress. I’ve mentioned a bit how that process works on my recent write up about Ulysses.
It’s a great app, and I hope to learn how to use it better with practice. Out of the gate, it already makes blogging – and journaling – better.
What’s your writing or blogging set up?
No comments:
Post a Comment
Thank you for sharing.